Node War

Black Desert Mobile’s Node War is undoubtedly one of the best ways to show off your teamwork of your Guild. Node War is a mode in which guilds battle each other for possession of Nodes. Winning a Node War will grant a 7-day possession of the newly acquired Node.
Shcedule
■ Date & Time
Every Monday, Thursday, Friday and Sunday between 19:00 - 20:00 or 21:00~22:00.
■ How to Participate
A certain number of guilds can participate in a Node War depending on the Node.
There will be numerous Nodes for each Node War. Please note the date of availability of each Node as each Node War will be different.
※ Each Node has 3 different tiers, labeled Tier 1-3. More rewards will be given when winning on a higher tier Node. Please note that a Tier 1 Node is the lowest tier.
e.g) Winning a Node War on a Tier 3 Node will grant more rewards than a Tier 2 Node.
Bidding and Selection
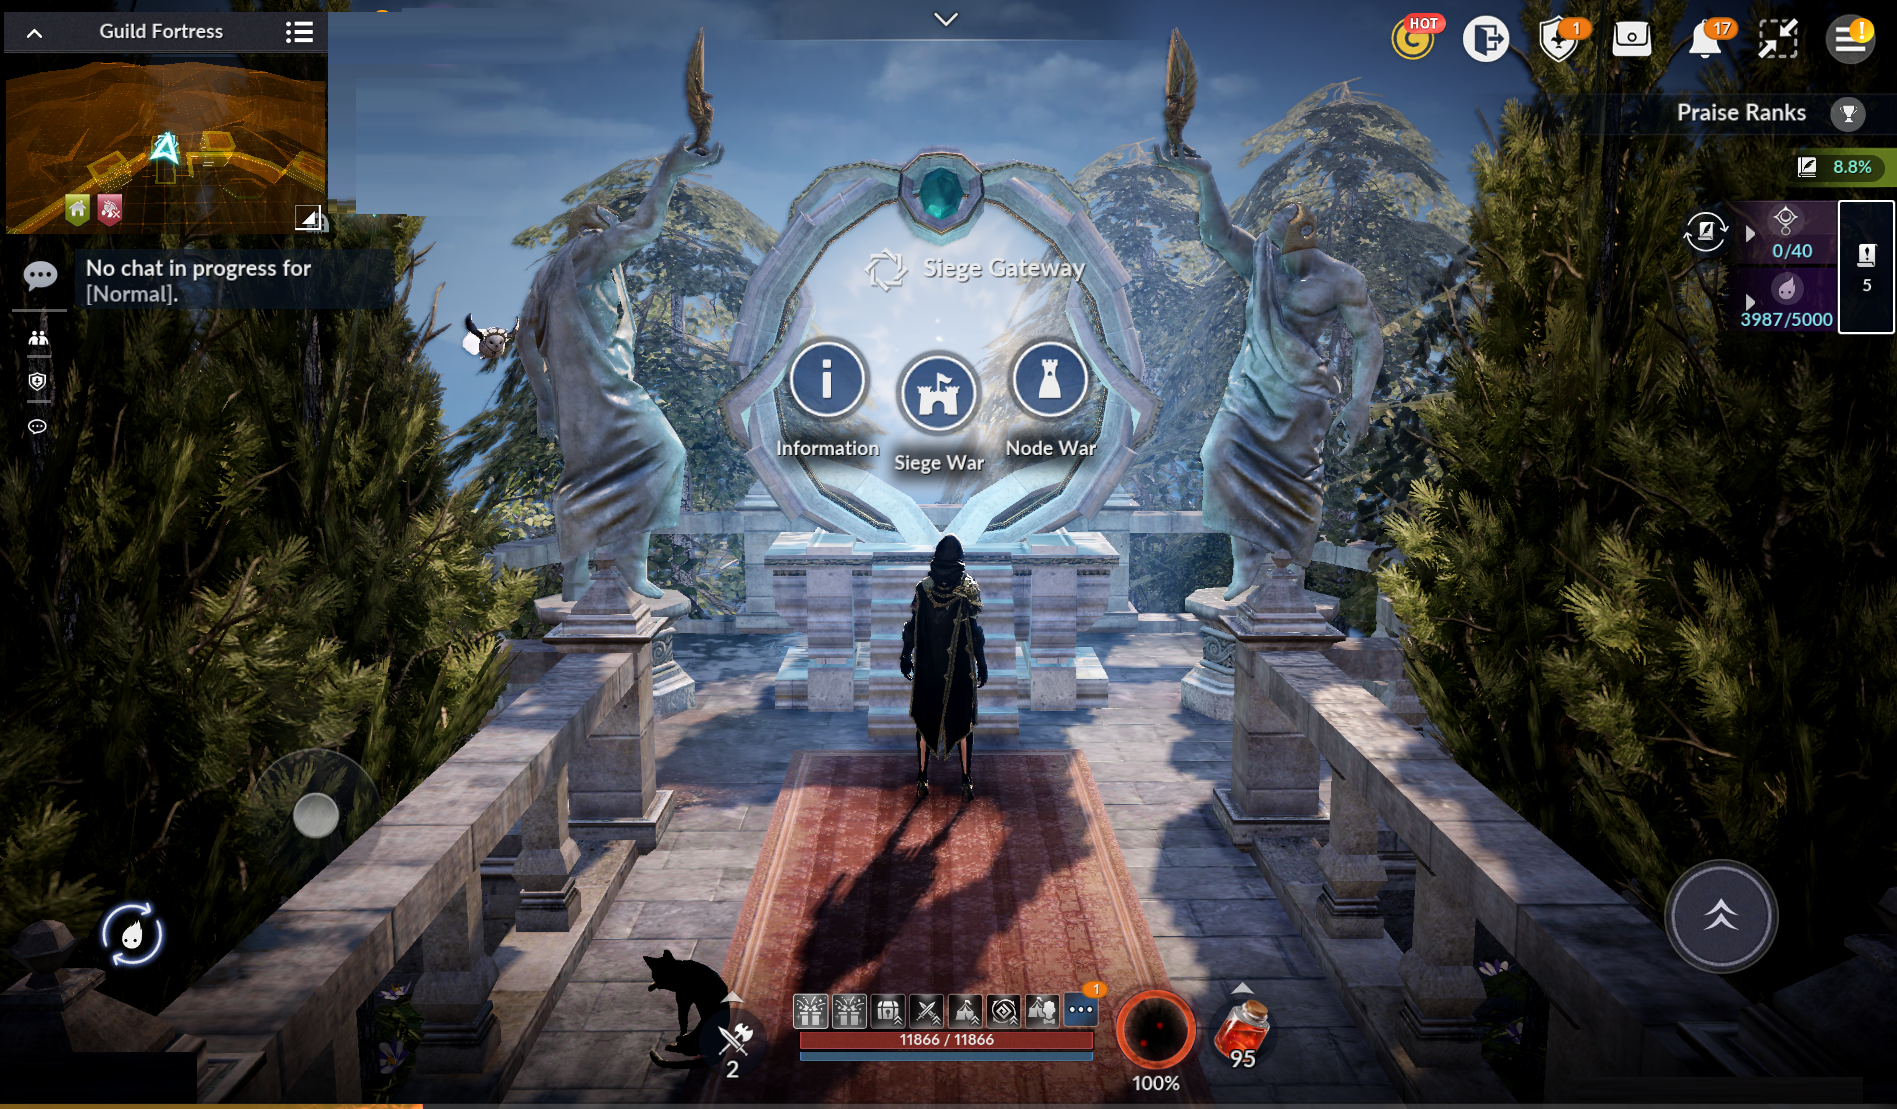
If you wish to check basic information or register for a Node War, press the [Node War] button in the [Guild Fortress - Siege Gateway] menu.
■ Requirement to participate Node War
Guild Masters and Officers can bid when the guild meets the following conditions:
| Guild Level | Level 3 or higher |
| Guild Members | At least 10 or more members |
※ Regardless of the Node Tier, a Guild can only occupy a maximum of one Node at a time.
※ Bidding can only be made once per day, and Guild can only occupy one Node per day.
※ If the Guild is currently occupying a Castle, bidding on another Castle/Node is not possible (they only have the option to defend the Castle or Node).
※ A guild can only occupy one node at a time.
※ Guilds can free the occupied Node only if they successfully take over another node.
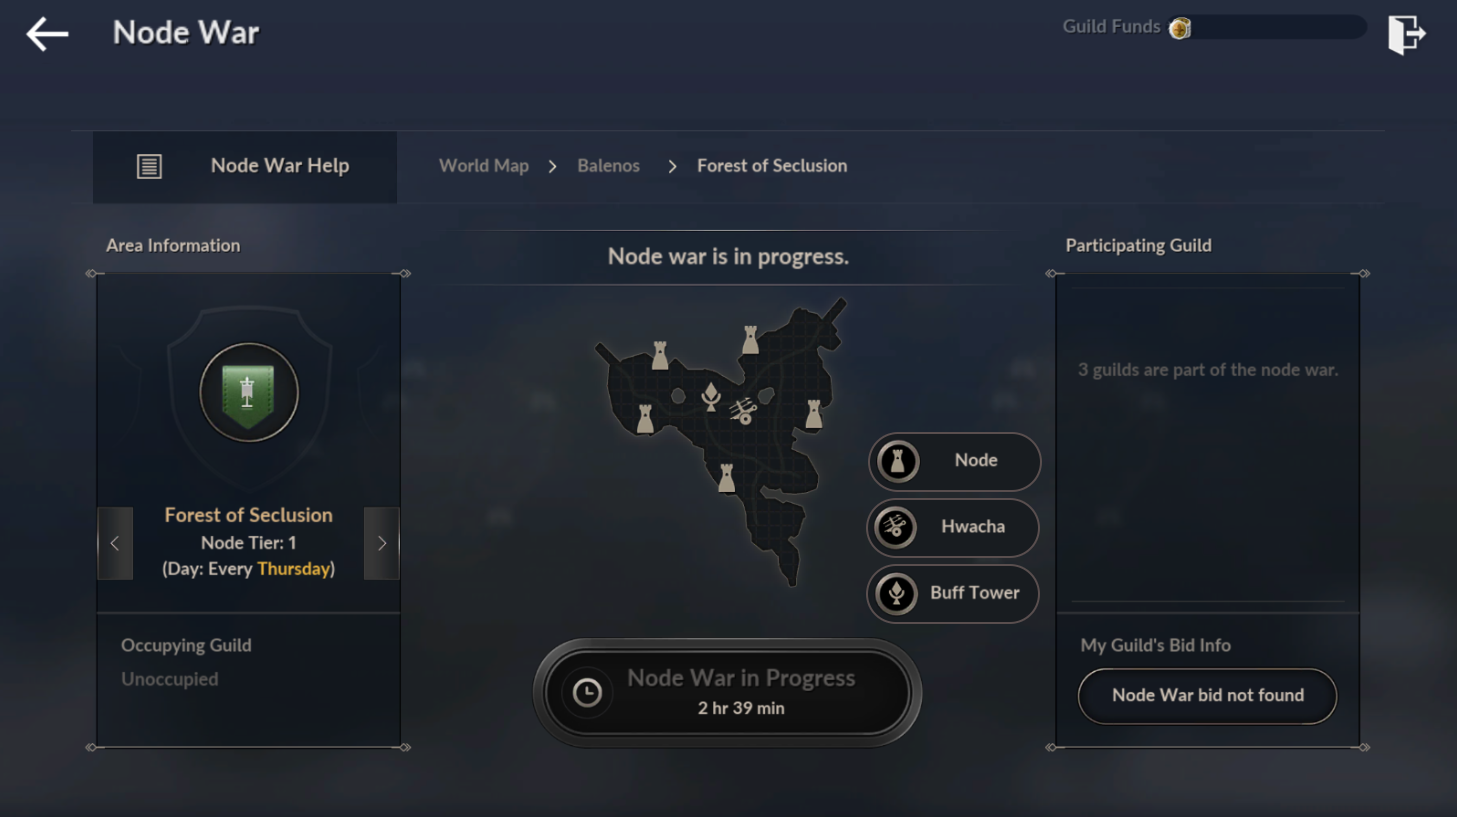
Guild Funds are used to make bids, and depending on the number of guilds allowed for that Node, the highest bids will be selected as participants.
※ Once the guilds are chosen, JOIN/LEAVE/KICK for Guild members and disbanding the Guild will not be available for the participating Guilds.
Preparation
Guilds will be selected to participate in the Node War once the bidding process is over.
The participating guilds will move on to the preparation phase.
Participating guilds will be able to prepare during the 10-hour preparation period after the bidding process ends at 9:00 and 11:00 (Server Time) before the actual Node War at 19:00 and 21:00 (Server Time).
Guild members will be able to upgrade the Holy Artifact, Guard Towers, and Barricades at the Guild Fortress by consuming personal resources. In addition, you will also be able to craft weapons and arms to strengthen your battle such as Fire Shot Supply Unit and cannons
(Shroud Knights' Cannon, Katan Army Cannon, and Valencia Cannon)
※ Barricades cannot be repaired.
※ Holy Artifact, Defense Towers, and Barricades will obtain extra HP when upgraded.
※ Guilds will not be able to ourchase elephants nor craft cannons during the preparation phase.
※ Guild Skills cannot be leveled up during the Node War preparation phase.
✓ Armory, Den, Guild Skills
| Armory | Craft Cannons, Construct Fire Shot Supply Depot. |
| Den | Purchase Elephants and Ogres. (Ogres can only be used in Siege War) |
| Guild Skill | Level up Cannon Knowledge, Elephant Training, Orge Skills |
Starting Node War
The defending Guild and attacking Guilds (which are the 2 Guilds with the highest bids) will each be randomly placed.
Guild members will be able to enter the Node War through the Siege Gateway at 19:00 and 21:00 (Server Time) after the preparation phase.
※ Guild members must be a part of the guild for at least 7 days to be able to participate in the Node War.
Eg. If you join a guild on a Thursday, you can participate in a Node War next Friday.
Holy Artifact Defense Towers and Barricades are positioned around the Holy Artifact, requiring strategic use of various siege weapons and skills.
|
Siege Objectives
|
Holy Artifact | The Holy Artifact positioned in the center of your Guild’s base must be protected at all cost in order to win the Node War. You must destroy any opposing Guild’s Holy Artifact in order to win the Node War. It is important to find the balance between defending your Guild’s Holy Artifact and attacking the opposing Guild’s Holy Artifact to win. If you die during the war, you will be revived near your Holy Artifact. The guild will lose the Node war when the Holy Artifact’s HP reaches 0. |
| Defense Tower | This is a defense tower in a fixed position near the Guild’s Holy Artifact. It will automatically attack any approaching enemies. | |
| Barricade | An obstacle set in place near a Guild’s Holy Artifact that helps keep incoming enemies at bay. Enemies will be able to move in between any destroyed Barricades. |
|
|
Siege Weapons
|
Flame Tower, Enhanced Flame Tower |
This is an effective siege weapon for dealing with enemies approaching to attack your Node. It can only be installed at designated locations and cannot be moved once installed. You can change its direction, and its Flame Attack deals wide-area flame damage in the targeted direction. After using Normal Attacks 3 times, you can use an enhanced Flame Attack. |
| Cannon | Each side will have 3 elephants and 10 cannons. You can ride on cannons to attack the opposing guild. | |
| Elephants | Elephants will also attack and can inflict high amounts of damage to Holy Artifacts, gates, and enemies. | |
|
Fire Shot Supply Units |
Fire Shot Supply Units can be summoned one at a time. You can obtain a maximum of 3 Fire Shot at Fire Shot Supply Units near the Holy Artifacts. ※ 3 Fire Shots are available to use within a Node War session. For instance, After 1 Fire Shot is fired, another one can be obtained.
An Adventurer who was given a Fire Shot cannot be inflicted by Normal attack and can use skills such as [Evade], [Run], and [Throw].
Throw the Fire Shot to inflict damage to enemy guild members, siege units and siege weapons.
|
|
| Guild Skills | - | Guilds can also use Guild Skills to provide strong but temporary buffs to Guild members. Available Guild Skills are as follows and can be upgraded in the Guild Menu by using guild funds. 1) Call to Battle: Attack 2) Call to Battle: Defense 3) Call to Battle: Move Speed |
|
Hwacha
|
Neutral Hwacha | A weapon with an extremely long-range that is capable of inflicting continuous damage to enemies. It can be controlled by the Adventurer that first mounts it, but can also be used by other Adventurers once the mounted Adventurer has been defeated. |
|
Ogre
|
Battle-Hardened Ogre |
· The guild to deliver the last blow to the Battle-Hardened Ogre will get a powerful buff for 5 minutes. - The buff you get from defeating Battle-Hardened Ogre will get stronger after each additional defeat of the Ogre. |
| Node name | Simultaneous Summon Limit |
| Altar of Agris | Canon x5, Elephant x1, Fire Shot Supply Unit x1, Recovery Tower x1, Canon Observatory x1, Indomitable Flag x1, Fire Tower x2 |
| Dernyl Farm | Canon x5, Elephant x1, Fire Shot Supply Unit x1, Recovery Tower x1, Canon Observatory x1, Indomitable Flag x1, Fire Tower x2 |
| Northern Plantation | Recovery Tower x1 |
| Rhutum Outstation | Recovery Tower x1 |
| Ahto Farm | Canon x5, Elephant x1, Fire Shot Supply Unit x1, Recovery Tower x1, Canon Observatory x1, Indomitable Flag x1, Fire Tower x2 |
| Velia Farmlands | Recovery Tower x1 |
| Forest of Plunder | Canon x5, Elephant x1, Fire Shot Supply Unit x1, Recovery Tower x1, Canon Observatory x1, Indomitable Flag x1, Fire Tower x2 |
| Naga Extraction Mill | Canon x6, Elephant x1, Fire Shot Supply Unit x1, Recovery Tower x1, Canon Observatory x1, Indomitable Flag x1, Fire Tower x2 |
| Orc Camp | Canon x4, Elephant x1, Fire Shot Supply Unit x1, Recovery Tower x1, Canon Observatory x1, Indomitable Flag x1, Fire Tower x2 |
| Troll Defense Outpost | Canon x5, Elephant x1, Fire Shot Supply Unit x1, Recovery Tower x1, Canon Observatory x1, Indomitable Flag x1, Fire Tower x2 |
| Quint Hill | Canon x5, Elephant x1, Fire Shot Supply Unit x1, Recovery Tower x1, Canon Observatory x1, Indomitable Flag x1, Fire Tower x2 |
| Cursed Lands | Recovery Tower x1 |
| Hidden Monastery | Canon x4, Elephant x1, Fire Shot Supply Unit x1, Recovery Tower x1, Canon Observatory x1, Indomitable Flag x1, Fire Tower x2 |
| Marni's Second Lab | Recovery Tower x1 |
| Highlands | Recovery Tower x1 |
| Plains of Agris | Recovery Tower x1 |
| Forest of Seclusion | Recovery Tower x1 |
| Ehwaz Hill | Canon x5, Elephant x1, Fire Shot Supply Unit x1, Recovery Tower x1, Canon Observatory x1, Indomitable Flag x1, Fire Tower x2 |
| Northern Quarry | Canon x4, Elephant x1, Fire Shot Supply Unit x1, Recovery Tower x1, Canon Observatory x1, Indomitable Flag x1, Fire Tower x2 |
| Lynch Farm Ruins | Canon x4, Elephant x1, Fire Shot Supply Unit x1, Recovery Tower x1, Canon Observatory x1, Indomitable Flag x1, Fire Tower x2 |
| Castle Ruins Entrance | Canon x5, Elephant x1, Fire Shot Supply Unit x1, Recovery Tower x1, Canon Observatory x1, Indomitable Flag x1, Fire Tower x2 |
| Naga Swamplands | Canon x4, Elephant x1, Fire Shot Supply Unit x1, Recovery Tower x1, Canon Observatory x1, Indomitable Flag x1, Fire Tower x2 |
| Bradie Fortress | Canon x6, Elephant x1, Fire Shot Supply Unit x1, Recovery Tower x1, Canon Observatory x1, Indomitable Flag x1, Fire Tower x2 |
| Harpy Cliff | Canon x5, Elephant x1, Fire Shot Supply Unit x1, Recovery Tower x1, Canon Observatory x1, Indomitable Flag x1, Fire Tower x2 |
| Old Dandelion | Canon x6, Elephant x1, Fire Shot Supply Unit x1, Recovery Tower x1, Canon Observatory x1, Indomitable Flag x1, Fire Tower x2 |
| Bree Tree Forest | Canon x5, Elephant x1, Fire Shot Supply Unit x1, Recovery Tower x1, Canon Observatory x1, Indomitable Flag x1, Fire Tower x2 |
| Forsaken Lands | Canon x5, Elephant x1, Fire Shot Supply Unit x1, Recovery Tower x1, Canon Observatory x1, Indomitable Flag x1, Fire Tower x2 |
| Kaia Pier | Canon x5, Elephant x1, Fire Shot Supply Unit x1, Recovery Tower x1, Canon Observatory x1, Indomitable Flag x1, Fire Tower x2 |
| Inner Mansha Forest | Recovery Tower x1 |
| Treant Forest | Canon x6, Elephant x1, Fire Shot Supply Unit x1, Recovery Tower x1, Canon Observatory x1, Indomitable Flag x1, Fire Tower x2 |
| Crioville | Recovery Tower x1 |
| Behr River Downstream | Canon x4, Elephant x1, Fire Shot Supply Unit x1, Recovery Tower x1, Canon Observatory x1, Indomitable Flag x1, Fire Tower x2 |
| Altinova Entrance | Recovery Tower x1 |
| Abandoned Iron Mine Mining Pit | Canon x4, Elephant x1, Fire Shot Supply Unit x1, Recovery Tower x1, Canon Observatory x1, Indomitable Flag x1, Fire Tower x2 |
| Kasula Farm | Recovery Tower x1 |
| Node Name | Max Summonable Weapons |
| Altar of Agris | Canon x10, Indomitable Flag x1, Flame Tower x4 |
| Dernyl Farm | Canon x10, Indomitable Flag x1, Flame Tower x4 |
| Northern Plantation | Recovery Tower x1 |
| Rhutum Outstation | Recovery Tower x1 |
| Ahto Farm | Canon x10, Indomitable Flag x1, Flame Tower x4 |
| Velia Farmlands | Recovery Tower x1 |
| Forest of Plunder | Canon x10, Indomitable Flag x1, Flame Tower x4 |
| Naga Extraction Mill | Canon x10, Indomitable Flag x1, Flame Tower x4 |
| Orc Camp | Canon x10, Indomitable Flag x1, Flame Tower x4 |
| Troll Defense Outpost | Canon x10, Indomitable Flag x1, Flame Tower x4 |
| Quint Hill | Canon x10, Indomitable Flag x1, Flame Tower x4 |
| Cursed Lands | Recovery Tower x1 |
| Hidden Monastery | Canon x10, Indomitable Flag x1, Flame Tower x4 |
| Marni's Second Lab | Recovery Tower x1 |
| Highlands | Recovery Tower x1 |
| Plains of Agris | Recovery Tower x1 |
| Forest of Seclusion | Recovery Tower x1 |
| Ehwaz Hill | Canon x10, Indomitable Flag x1, Flame Tower x4 |
| Northern Quarry | Canon x10, Indomitable Flag x1, Flame Tower x4 |
| Lynch Farm Ruins | Canon x10, Indomitable Flag x1, Flame Tower x4 |
| Castle Ruins Entrance | Canon x10, Indomitable Flag x1, Flame Tower x4 |
| Bradie Fortress | Canon x10, Indomitable Flag x1, Flame Tower x4 |
| Bradie Fortress | Canon x10, Indomitable Flag x1, Flame Tower x4 |
| Harpy Cliff | Canon x10, Indomitable Flag x1, Flame Tower x4 |
| Old Dandelion | Canon x10, Indomitable Flag x1, Flame Tower x4 |
| Bree Tree Forest | Canon x10, Indomitable Flag x1, Flame Tower x4 |
| Forsaken Lands | Canon x10, Indomitable Flag x1, Flame Tower x4 |
| Kaia Pier | Canon x10, Indomitable Flag x1, Flame Tower x4 |
| Inner Mansha Forest | Recovery Tower x1 |
| Treant Forest | Canon x10, Indomitable Flag x1, Flame Tower x4 |
| Crioville | Recovery Tower x1 |
| Behr River Downstream | Canon x10, Indomitable Flag x1, Flame Tower x4 |
| Altinova Entrance | Recovery Tower x1 |
| Abandoned Iron Mine Mining Pit | Canon x10, Indomitable Flag x1, Flame Tower x4 |
| Kasula Farm | Recovery Tower x1 |
Assembly

- This is a guild function exclusive only for Guild Masters and Guild Officers.
ㆍ This feature can be used once, 10 minutes after the start of any Node War, except for Siege Wars.- The assembly feature can be used without any limit on location.

- When the assembly feature is used, a button will appear allowing all Guild Members to teleport to the assembly location for 1 minute.
ㆍ Even if the Guild Master or Guild Officer who used the assembly dies, the assembly feature will be maintained.
- You cannot use it while mounted on an Elephant or Cannon, waiting to revive, carrying Fire Shot Supply Units, or repairing a Neutral Fortress.
Fortress Siege
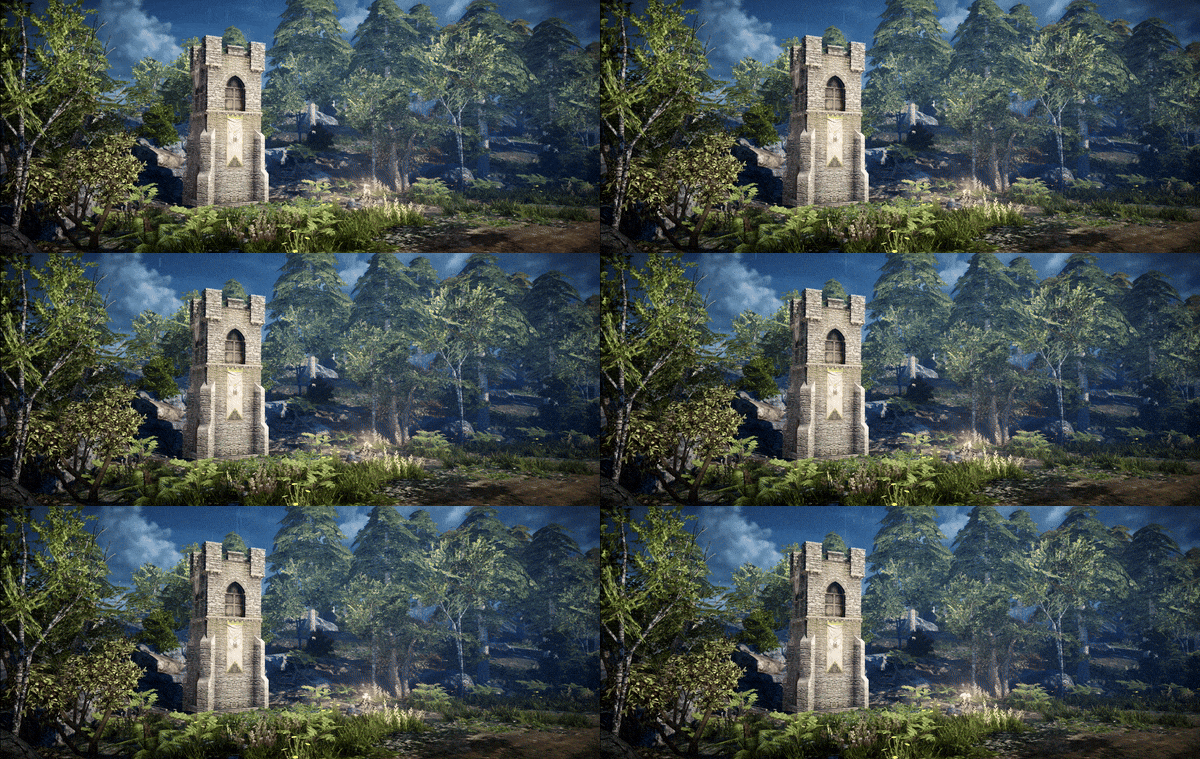
- Some Fortresses feature a 20-minute Fortress Siege during the Node War.
ㆍ The Fortresses where Fortress Sieges take place do not change.
- In a Fortress Siege, the guild that captures the most Fortresses before the Node War ends wins.
ㆍ If the number of captured Fortresses is the same, the guild with the highest sum total of remaining HP for all occupied Fortresses wins.
- Fortresses start in a neutral state, and the guild that deals the final hit (reducing the HP to 0) occupies the Fortress.
ㆍ Once occupied, the Fortress' HP will be restored to full.
ㆍ If another guild attacks an occupied Fortress and reduces its HP to 0, the guild that lands the final blow will occupy the Fortress.
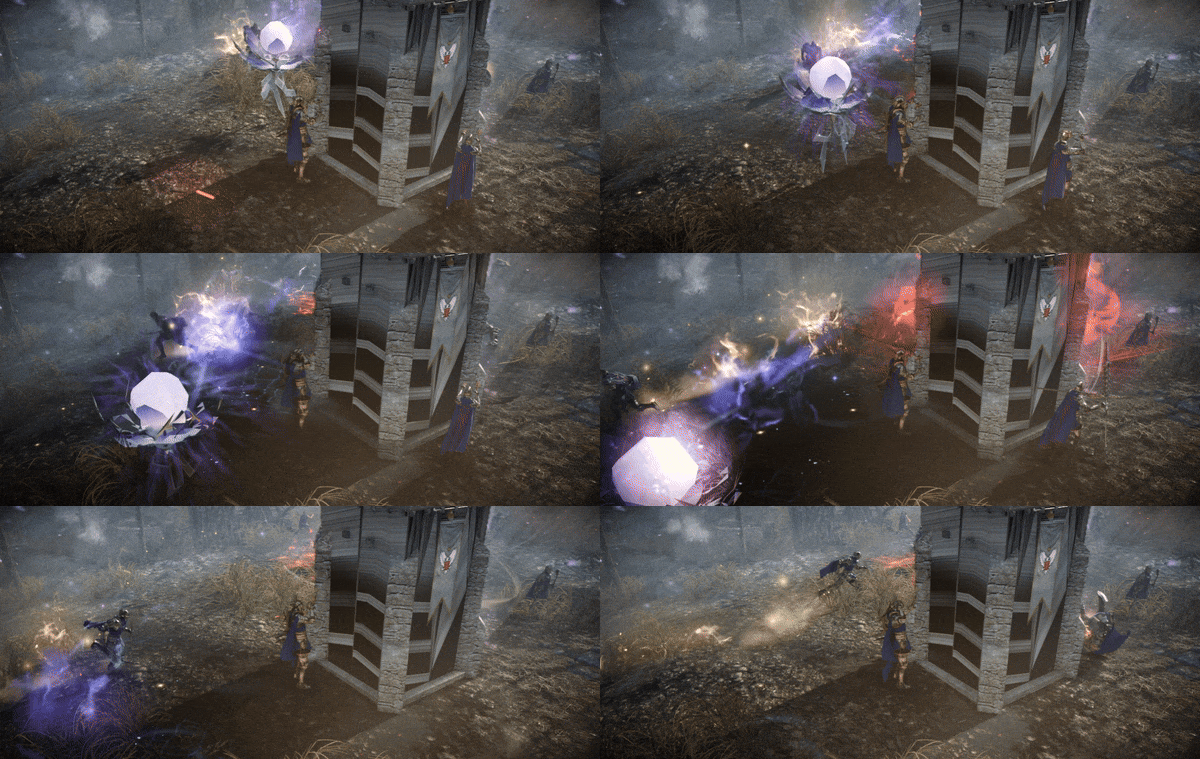
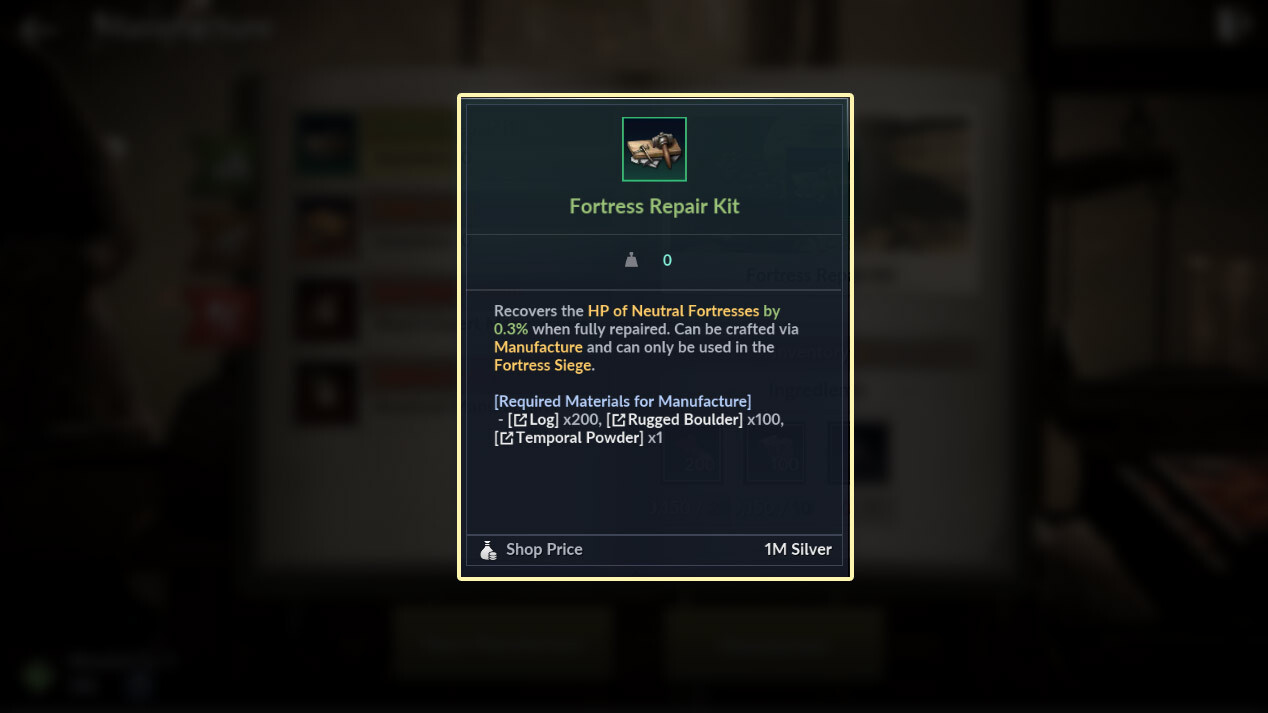
- The guild that occupies the Fortress can use the [Fortress Repair Kit] to repair it.
ㆍ You can stop the repair by using Evasion during the repair process.
- Holy Artifacts and Neutral Hwachas do not appear in the Fortress Siege.
- Other than the Recovery Tower, no other structures or objects can be installed.
- In Fortress Siege, the Guild Master and Guild Officer Adventurers can send messages to all guild members through the speech bubble icon located on the right side of the HP bar.
ㆍ The message cooldown is 8 seconds per Adventurer.
Fortress Siege Victory Conditions
- The victorious guild is determined based on the following priorities at the end of the Node War:
- 1st Priority: The guild with the most occupied Fortresses.
| Guild A | Guild B | Guild C |
| 1 Fortress Conquered | 2 Fortresses Conquered | 1 Fortress Conquered |
| Guild B wins | ||
- 2nd Priority: When guilds are occupying the same number of Fortresses, the guild with the highest total remaining HP wins.
| Guild A | Guild B | Guild C |
| 1 Fortress Conquered / 99% HP | 1 Fortress Conquered / 70% HP | 1 Fortress Conquered / 60% HP |
| Guild A wins | ||
- The remaining HP of Fortresses is displayed as a percentage on the results screen, but the total HP is calculated as a sum of the actual values, not percentages.
- Even if the displayed HP percentages are the same on the results screen, the guild with the higher actual value wins.
- Since the result is calculated based on the sum of the actual values, it is very unlikely for the HP to be exactly the same.
- If the victor cannot be determined based on the 1st and 2nd priorities, it will be a draw.
ㆍShould it come to a draw, the node's status will remain unchanged from before the Node War took place.
Enhanced CP Limit Nodes

- When entering a CP limit Node, the stat limits will be applied per category based on the Node level as follows.
- CP Limit Nodes will change weekly.
| Tier | Max Stat Limit | |
| Tier 1 | 40,000 Max HP 22,650 AP 22,350 DP AP Against Monsters +250 DP Against Monsters +250 PvP Damage Taken -5% PvP Damage Dealt +5% All Branch Damage +5% All Branch Damage Taken -5% |
|
| Tier 2 | 50,000 Max HP 30,150 AP 29,850 DP AP Against Monsters +500 DP Against Monsters +500 PvP Damage Taken -10% PvP Damage Dealt +10% All Branch Damage +10% All Branch Damage Taken -10% |
|
- When entering CP Limit Node Max HP will be adjusted.
ㆍ E.g.) When entering a Tier 1 Node with a Max HP of 15,000, it will be adjusted to 40,000.
- Upon exiting the Node War, HP will be fully recovered.
- Battle-Hardened Ogres will not appear in this Node.
Holy Artifact Node
Node War Victory Conditions
- If no Holy Artifacts are destroyed when the Node War time's up, the victor is determined by the following rules.
- The guild with the most remaining HP on their Holy Artifact wins.
- If the HP of both Holy Artifacts is identical, neutral Nodes are liberated, and occupied Nodes are won by the occupying guild.
| Example | Result | |
| When Node is not occupied: When Guild A Holy Artifact remaining HP is at 50% When Guild B Holy Artifact remaining HP is at 50% When Guild C Holy Artifact remaining HP is at 51% |
Guild C wins | |
| When Node is not occupied: When Guild A Holy Artifact remaining HP is at 50% When Guild B Holy Artifact remaining HP is at 50% When Guild C Holy Artifact remaining HP is at 50% |
Node is liberated | |
| When Guild A is occupying the Node: When Guild A Holy Artifact remaining HP is at 1% When Guild B Holy Artifact remaining HP is at 50% When Guild C Holy Artifact remaining HP is at 50% |
Guild A wins | |
| When Guild A is occupying the Node: When Guild A Holy Artifact remaining HP is at 7% When Guild B Holy Artifact remaining HP is at 80% When Guild C Holy Artifact remaining HP is at 50% |
Guild B wins | |
Node Structure

- Node War structures can now only be installed at designated locations.
ㆍ This applies only to immovable structures such as the Cannon Observatory, Indomitable Flag, and Flame Tower. (Holy Artifact Node).

- The following structures and items can be manufactured via [Menu] > [Manufacture]
① Indomitable Flag
- The Indomitable Flag can be summoned by the Guild Master or Guild Officer at the designated location 10 minutes after the Node War starts.
ㆍ It can be installed no closer than 30 meters from the enemy's Holy Artifact.
- It can only be summoned once per Node War.
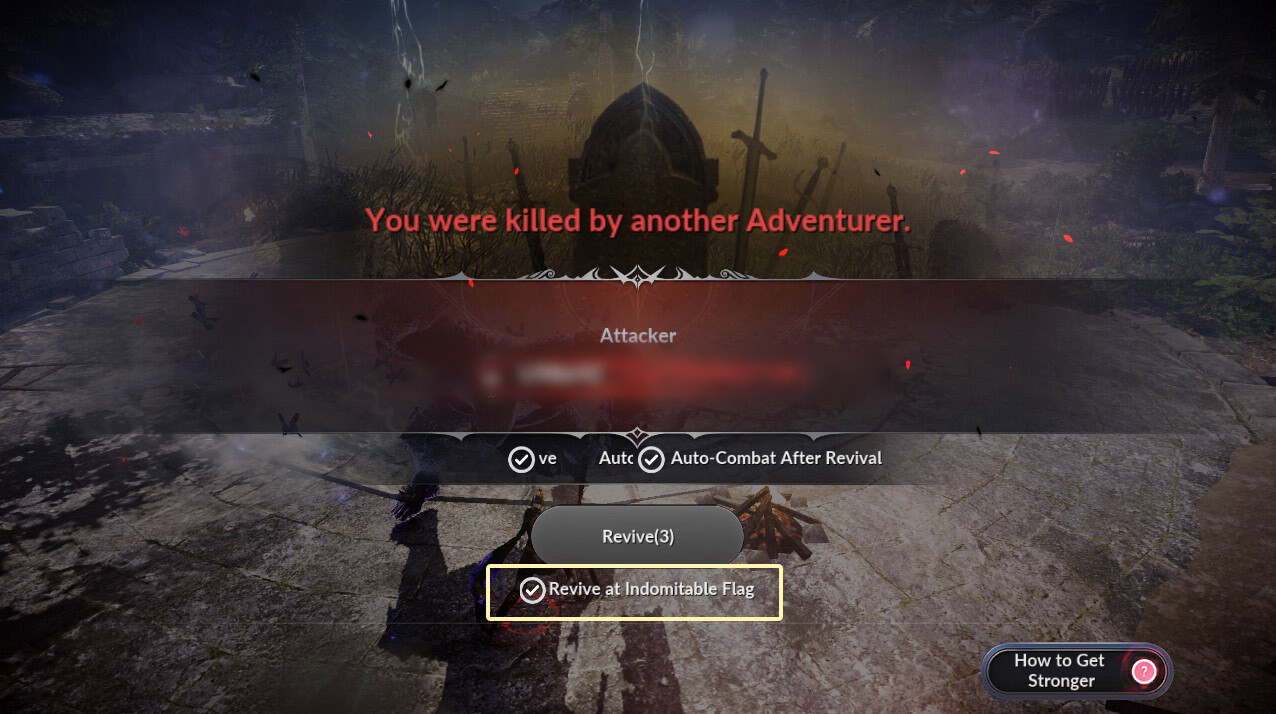
- After death, you can select "Revive at Indomitable Flag" on the waiting screen.
- Adventurers from other guilds can attack and destroy it, but it remains until destroyed.
- You can donate up to Indomitable Flag x1 to the Armory.
② Assembly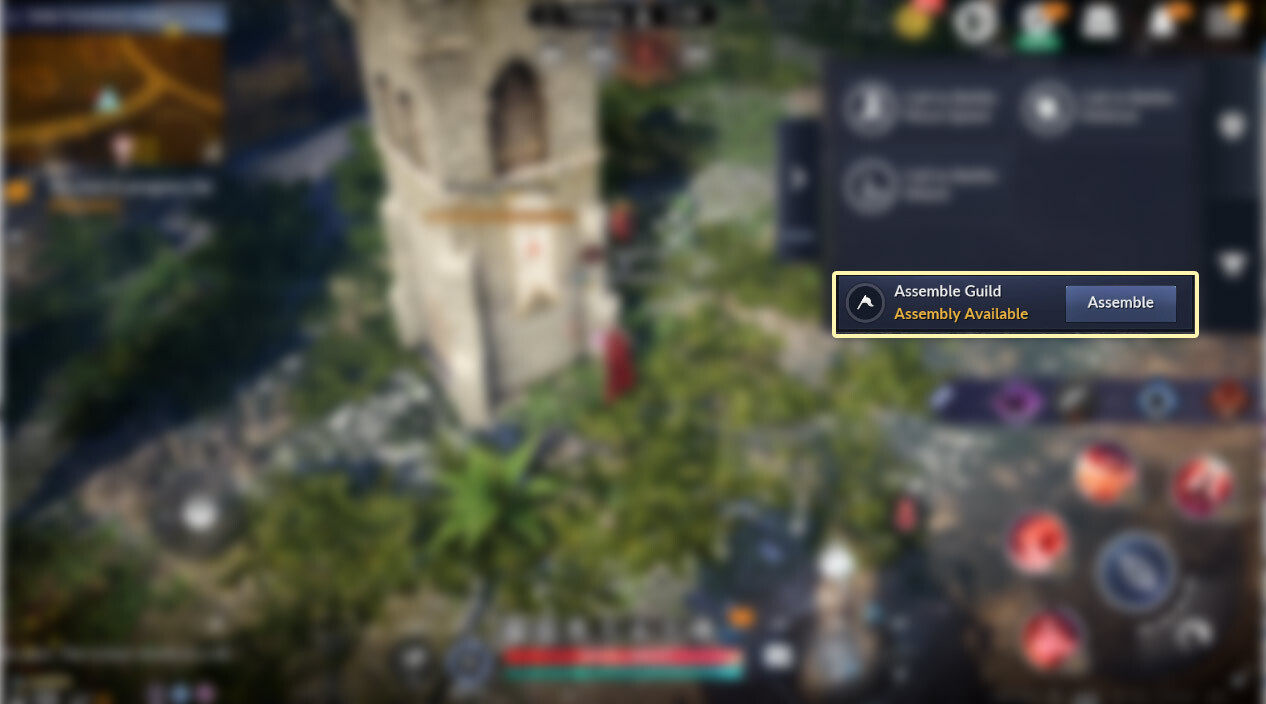
- Guild Masters and Guild Officers can use Assembly feature.
ㆍ This feature can be used once, 10 minutes after the start of any Node War, except for Siege Wars.
- The assembly feature can be used without any limit on location.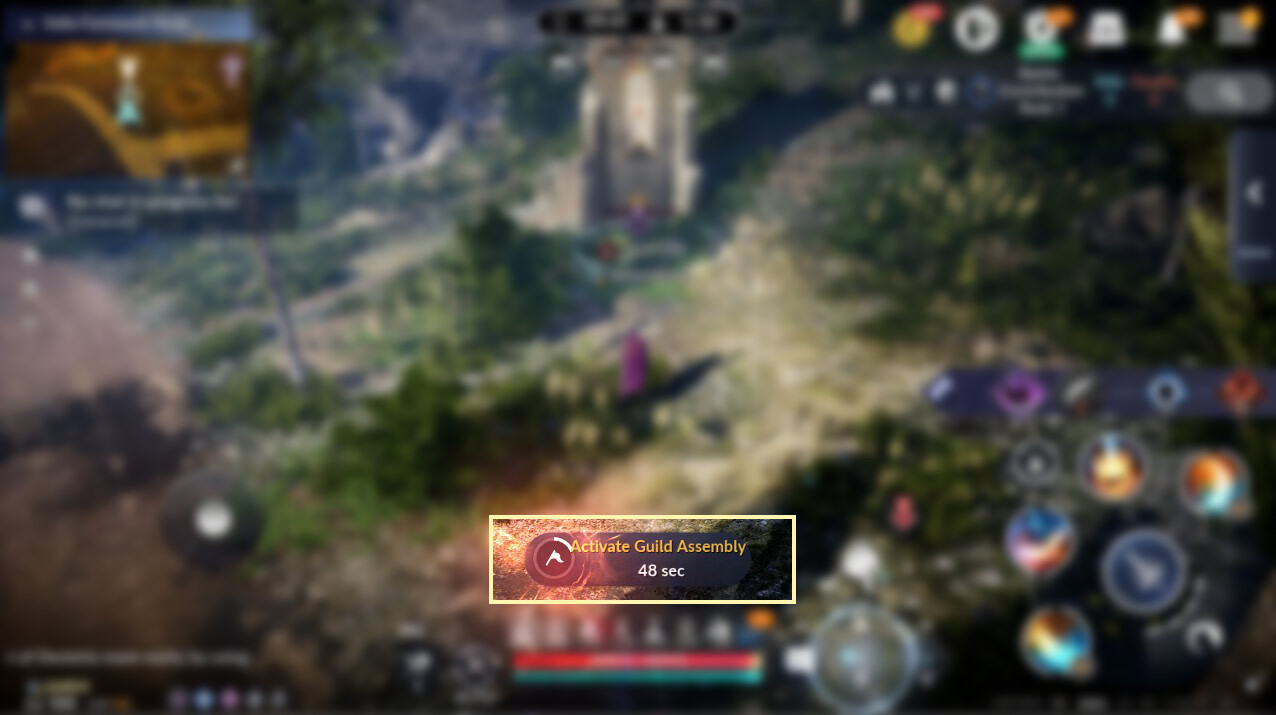
- When the assembly feature is used, a button will appear allowing all Guild Members to teleport to the assembly location for 1 minute.
ㆍ Even if the Guild Master or Guild Officer who used the assembly dies, the assembly feature will be maintained.
- You cannot use it while mounted on an Elephant or Cannon, waiting to revive, carrying Fire Shot Supply Units, or repairing a Neutral Fortress.
- All guild members receive buffs based on the occupied Nodes/Castles.
- Buffs are applied or removed the moment ownership of the Node/Castle changes.
| Castle/Node | Tier | Buffs |
| Calpheon Siege War | Castle | Field Combat EXP +30%, Great Desert, Everfrost, Sherekhan Item Drop Rate + 6% |
| Valencian Siege War | Castle | Field Combat EXP +30%, Great Desert, Everfrost, Sherekhan Item Drop Rate + 6% |
| Altar of Agris | 3 | Everfrost Item Drop Rate + 6% |
| Dernyl Farm | 3 | Great Desert Item Drop Rate + 6% |
| Northern Plantation | 3 | PvP Damage Dealt +5%, PvP Damage Taken -5% |
| Rhutum Outstation | 3 | Sherekhan Item Drop Rate + 6% |
| Ahto Farm | 3 | Field Combat EXP + 30% |
| Velia Farmlands | 2 | Everfrost Item Drop Rate + 4% |
| Forest of Plunder | 2 | Great Desert Item Drop Rate + 4% |
| Naga Extraction Mill | 2 | Max HP +1500 |
| Orc Camp | 2 | Great Desert Item Drop Rate + 4% |
| Troll Defense Outpost | 2 | Sherekhan Item Drop Rate + 4% |
| Quint Hill | 2 | Field Combat EXP + 20% |
| Cursed Lands | 2 | Everfrost Item Drop Rate + 4% |
| Hidden Monastery | 2 | AP Against Monsters +300, DP Against Monsters +300 |
| Marni's Second Lab | 2 | Life Skill EXP +10% (Log, Forage, Mine, Fish, Excavate, Manufacture, Cook) |
| Highlands | 2 | PvP Damage Dealt +3%, PvP Damage Taken -3% |
| Plains of Agris | 1 | Max HP +1000 |
| Forest of Seclusion | 1 | PvP Damage Dealt +1%, PvP Damage Taken -1% |
| Ehwaz Hill | 1 | Max HP +1000 |
| Northern Quarry | 1 | Field Combat EXP + 10% |
| Lynch Farm Ruins | 1 | Great Desert Item Drop Rate + 2% |
| Castle Ruins Entrance | 1 | Great Desert Item Drop Rate + 2% |
| Naga Swamplands | 1 | Great Desert Item Drop Rate + 2% |
| Bradie Fortress | 1 | Everfrost Item Drop Rate + 2% |
| Harpy Cliff | 1 | Sherekhan Item Drop Rate + 2% |
| Old Dandelion | 1 | Everfrost Item Drop Rate + 2% |
| Bree Tree Forest | 1 | Everfrost Item Drop Rate + 2% |
| Forsaken Lands | 1 | Sherekhan Item Drop Rate + 2% |
| Kaia Pier | 1 | AP Against Monsters +100, DP Against Monsters +100 |
| Inner Mansha Forest | 1 | Life Skill EXP +5% (Log, Forage, Mine, Fish, Excavate, Manufacture, Cook) |
| Treant Forest | 1 | Sherekhan Item Drop Rate + 2% |
| Crioville | 1 | Field Combat EXP + 10% |
| Behr River Downstream | 1 | AP Against Monsters +100, DP Against Monsters +100 |
| Altinova Entrance | 1 | Field Combat EXP + 10% |
| Abandoned Iron Mine Mining Pit | 1 | PvP Damage Dealt +1%, PvP Damage Taken -1% |
| Kasula Farm | 1 | Life Skill EXP +5% (Log, Forage, Mine, Fish, Excavate, Manufacture, Cook) |
- The guild bonus increases with each Node tier.
| Node/Castle | Post-Update |
| Tier 1 Node | 643,500,000,000 |
| Tier 2 Node | 1,039,500,000,000 |
| Tier 3 Node | 1,534,500,000,000 |
| Castle | 2,029,500,000,000 |
- 'Extravagant Medal of Honor' is given upon victory/defeat in a Node/Siege War.
| Node/Castle | Upon Victory | Upon Defeat |
| Tier 1 Node | 5 | 3 |
| Tier 2 Node | 10 | 5 |
| Tier 3 Node | 15 | 8 |
| Castle | 50 | 10 |
Victory condition & Rewards
The Node War will end once all opposing Guild’s Holy Artifacts are destroyed or the 1-hour time limit ends.
If a Guild’s Holy Artifact is destroyed, the Guild will leave the battlefield. The guild that successfully protects their Holy Artifact will occupy the Node.
The winning Guild can collect tax as Guild Funds and distribute Guild Bonus.
Guild Bonuses are sent via in-game mail once per week, and the available claim count resets every Saturday at 12:00.
If two or more Holy Artifacts remain until the end of the Node War, the region will become liberated and remain without an owner.
■ Unoccupied Node
The tax will stack and the next occupying Guild will collect the unclaimed tax.

- With the bonus distribution system, you can obtain Node/Siege Node Bonuses.
ㆍ Bonuses can be distributed only once per week, so please receive the bonus after careful consideration if you plan to challenge higher tier Node Wars in the same week.
| Chests | Contents | |
| Tier 1 Node Bonus | Extravagant Medal of Honor x35, Medal of Honor x50 | |
| Tier 2 Node Bonus | Extravagant Medal of Honor x40, Medal of Honor x100 | |
| Tier 3 Node Bonus | Extravagant Medal of Honor x45, Medal of Honor x150 | |
| Siege Node Bonus | Extravagant Medal of Honor x50, Medal of Honor x200 | |
- You can exchange the [Extravagant Medal of Honor] via Ray Poilet for various items.
| Item |
Extravagant Medal of Honor Quantity Required |
Limit |
| Brilliant Chaos Unknown Glyph x1 | 100 | 1 per Family |
| Embers of Hongik x1 | 40 | 2 per month |
| Co-op Rush Scroll x1 | 30 | 1 per Family |
| Dawning Moonstone x100 | 30 | 1 per Family |
| Voidsent Eye x1 | 30 | 2 per month |
| [Abyssal-Primal] Rune of Darkness Chest | 20 | 1 per Family |
| Token: Baby Kabua (Tier 7) | 15 | 1 per Family |
| Harmony Scroll | 9 | 1 per Family |
| Supreme EXP Scroll x100 | 3 | 3 per week |
| Restoration Scroll x1,000 | 3 | 1 per Family |
| Magical Essence x35,000 | 1 | 10 per week |
| Dimensional Fragment x100 | 2 | 5 per week |
| [Abyssal] Condensed Dark Energy Chest | 1 | No limit |